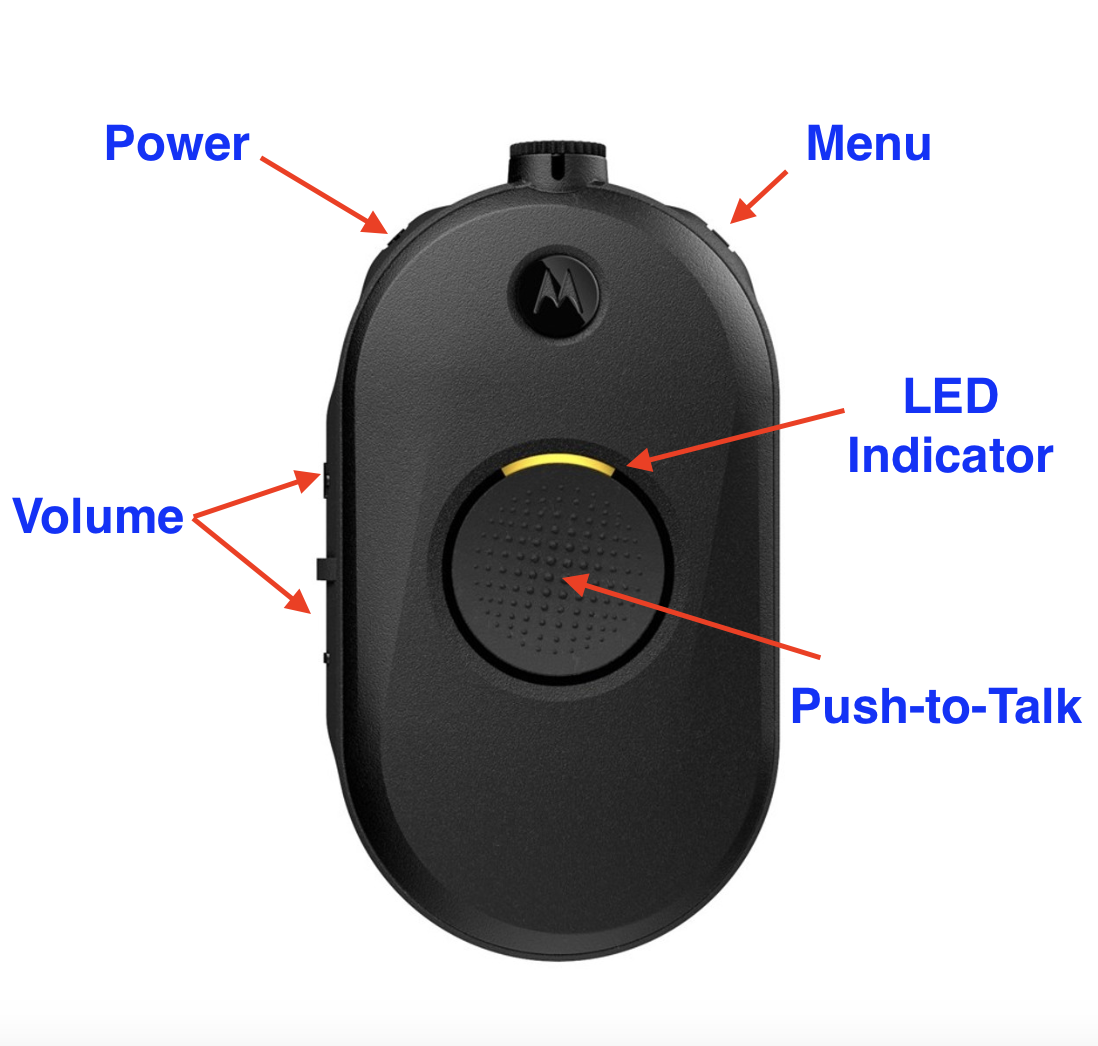
How to Program Your Motorola CLP1080e radio
How to Program the Motorola CLP1080e Radio
Review the below 4 step-by-step instructions on how to quickly and easily program your Motorola CLP1080e radio.

1. Begin with your Motorola CLP1080e radio powered off.
2. Access programming mode by following these steps (ensure you have the earpiece connected):
a. Simultaneously press and hold the PTT, MENU, and POWER buttons.
b. Maintain the simultaneous button press until you hear a series of chirping sounds along with a voice prompt indicating "programming mode." The LED indicator should start blinking in green.
3. Configure your desired settings:
a. Single-tap the MENU button, and you'll hear the channel number. Adjust your desired channel by using the VOLUME UP or VOLUME DOWN button. Once you've selected your preferred channel, proceed with the following steps:
i. Single-tap the MENU button again to access the "Frequency" number. Modify it by pressing the VOLUME UP or VOLUME DOWN button.
ii. Single-tap the MENU button once more to access the "Code" number. Adjust it as needed using the VOLUME UP or VOLUME DOWN button.
iii. If you wish to modify the settings for additional channels, tap the MENU button again until you hear the "Channel" number prompt and repeat the previous steps. When you've finished, proceed to the next step to save your settings.
4. Save your customized settings and exit programming mode:
a. To save your settings and exit programming mode, press and hold the PTT button until the radio emits a beep. The LED will return to its usual color according to the selected radio channel (red for Channel 1).
Need further assistance? We are happy to help!
