

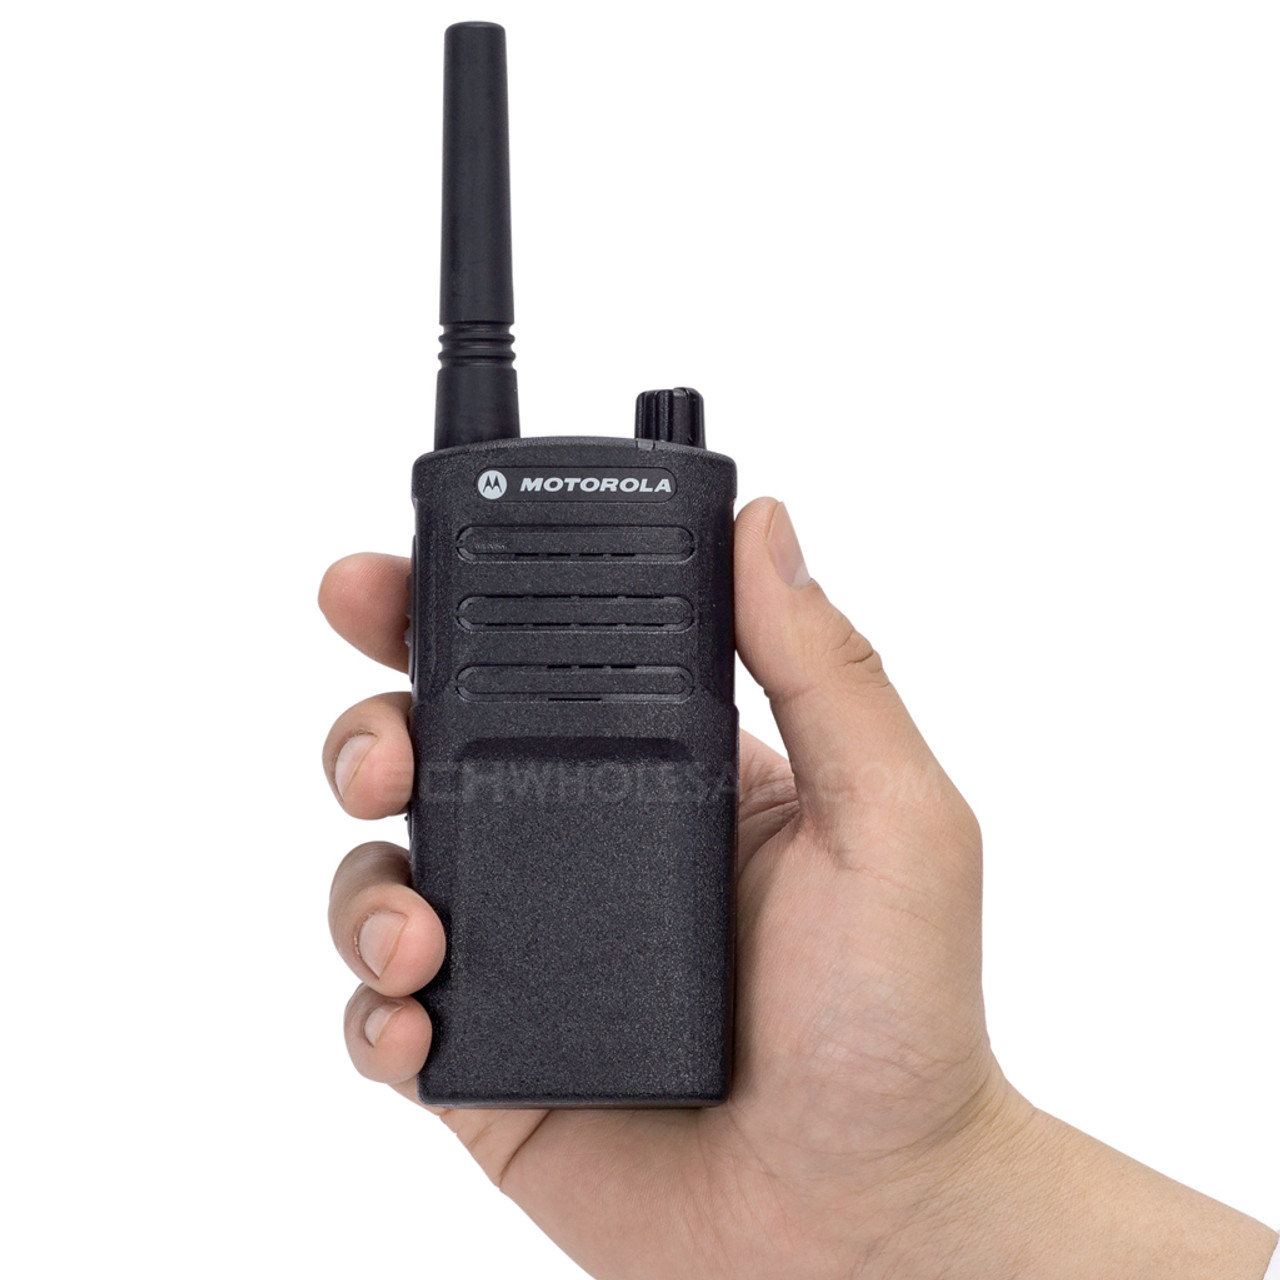
Welcome to your go-to support hub for Motorola RM Series two-way radios!
Explore our user manuals, easy setup guides, troubleshooting tips, and accessory recommendations below to keep your radios working perfectly and your team seamlessly connected. Everything here covers the RMU2040, RMU2080, RMU2080d, RMV2080 and RMM2050.
What are you trying to do?
Pick the task and go straight to it.
Start here
The three things people call us about
If you are here for one specific thing, it is almost always one of these.
How do I get into programming mode?
Hold PTT and SB1 together for three seconds while turning the radio on. The green LED blinks, the PROG icon appears, and the current channel name blinks. That is Advanced Configuration Mode, and it does everything except the CPS-only features. Full programming steps →
Our radios cannot hear each other.
The frequency and the interference eliminator code must match on every radio, and both radios have to be the same band — a UHF RMU2080 will never hear a VHF RMV2080. Check the code before you check anything else. Frequency and code charts →
How do I turn off the beeps and the talking?
Both are power-up toggles. Hold SB2 while turning the radio on to switch keypad sounds off, and hold SB1 to switch the voice prompt off. All power-up toggles →
Task 1
Where can I download the Motorola RM Series manual?
All three Motorola documents are below. Each opens in a new tab so you keep your place here.
Manual RM Series Two-Way Radio User GuideControls, LED states, display icons, Advanced Configuration Mode, scan, VOX and iVOX, cloning, the full 89-frequency UHF chart, the CTCSS and DPL code charts, troubleshooting, the authorized accessory list and warranty terms. ↗ Specs RM Series Product Spec Sheet Side-by-side data sheet for all six models, with receiver, transmitter, military standard test methods and environmental specifications. ↗ Brochure RM Series Brochure Coverage ratings by model, the Accelerated Life Testing detail, what ships in the box and the accessory part numbers. ↗↑ Back to tasks
Task 2
Which RM Series radio do I have?
The model number is printed on the label under the battery. Pop the battery off and you will see it. Here is what each model is.
| Model | Band | Frequency range | Channels | Display | Coverage rating |
|---|---|---|---|---|---|
| RMU2040 | UHF | 450–470 MHz | 4 | No | Up to 250,000 sq ft or 20 floors |
| RMU2080 | UHF | 450–470 MHz | 8 | No | Up to 250,000 sq ft or 20 floors |
| RMU2080d | UHF | 450–470 MHz | 8 | Yes | Up to 250,000 sq ft or 20 floors |
| RMV2080 | VHF | 150.8–160 MHz | 8 | No | Up to 220,000 sq ft or 13 floors |
| RMM2050 | MURS | 5 MURS frequencies | 5 | No | Up to 220,000 sq ft or 13 floors |
The five MURS frequencies on the RMM2050
- 154.57 MHz — 20.0 kHz bandwidth
- 154.60 MHz — 20.0 kHz bandwidth
- 151.82 MHz — 11.25 kHz bandwidth
- 151.88 MHz — 11.25 kHz bandwidth
- 151.94 MHz — 11.25 kHz bandwidth
RMU2080 vs RMU2080d: what the "d" changes
The "d" is for display. Both are UHF 450–470 MHz, 8 channels, 2 watts, on the same platform. The RMU2080d adds an LCD screen showing channel number, battery level, signal strength and feature icons, and it is slightly heavier — 9 oz versus 8.6 oz with the standard battery.
The display is also what makes channel alias names readable. A non-display RM radio can still carry custom channel names, but it announces them by voice instead of showing them.
Task 3
What do the buttons and display icons do?
Two side buttons, two navigation arrows, a menu button and two knobs. Everything on the radio is done with these.
| Control | What it does |
|---|---|
| On/Off/Volume knob | Powers the radio on and off and sets volume. Clockwise raises volume, counterclockwise lowers it. |
| Channel selector knob | Switches the radio between channels. Each channel carries its own frequency, interference eliminator code and scan setting. |
| Push-to-Talk (PTT) | Hold to talk, release to listen. Inside programming mode it also advances and saves settings. |
| Side Button 1 (SB1) | Configurable through CPS. The default setting is Monitor. |
| Side Button 2 (SB2) | Configurable through CPS. The default setting is Scan or Nuisance Channel Delete. |
| Left arrow / Button A | Assignable through CPS. Default: sends the currently programmed call tone. Pressing it tunes the radio to the preset channel and sounds a tone. Inside programming mode it changes values. |
| Right arrow / Button B | Assignable through CPS. Default: backlight mode. Pressing it tunes the radio to the preset channel and sounds a tone. Inside programming mode it changes values. |
| Menu button | Scrolls through and selects features in Programming Mode. Default: presets Channel 1. Hold four seconds to lock or unlock the keypad. |
| Accessory connector | Connects compatible audio accessories under the accessory cover. |
| Antenna | Non-removable on the RMU2080d. |
What the Monitor button actually does
Monitor is the default function of SB1, and it opens the squelch so you can hear everything on the channel before you key up. Hold SB1 to listen to channel traffic; if nothing is happening you will hear a static tone. Press SB1 again to release it. Once the traffic clears, press PTT to talk — the LED goes solid red while you transmit.
There is a related feature called CTCSS/DPL Defeat: pressing SB1 to set the interference eliminator code to 0 lets you hear all activity on the current channel regardless of code. That works when squelch is set to Silent and SB1 has not been reprogrammed to a different function.
Reading the RMU2080d display
The RMU2080d is the only RM Series model with a screen. Twelve indicators appear on it.
| Icon | Meaning |
|---|---|
| Battery level | Remaining battery, upper left corner. |
| Scan | The radio is in scan mode. |
| iVOX / VOX | Hands-free is enabled, or you are in a microphone programming or mic gain screen. |
| Keypad lock | Keypad lock is on. |
| Scramble | Scramble is enabled. |
| High power | The channel is transmitting or is set to high power. |
| Signal strength | Strength of the received signal, 1 (weakest) to 6 (strongest). |
| Channel number | The current channel. |
| CODE | Shown while programming interference eliminator codes. |
| FREQ | Shown while programming frequencies. |
| PROG | The radio is in Programming Mode. |
| CHAN | Shown while programming channel features. |
The LED tells you as much as the screen
On the RMU2040, RMU2080, RMV2080 and RMM2050 the LED is the only visual feedback you get, so it is the fastest way to diagnose a non-display radio.
| Radio status | LED indication |
|---|---|
| Power up | Solid red for two seconds |
| Transmit or receive | Solid red |
| Transmit in low power select | Solid orange |
| Channel busy | Solid orange |
| Scan mode | Rapid blinking red |
| VOX / iVOX mode | Double blinking red |
| Idle Programming Mode / Channel Mode | Blinking green |
| Cloning mode | Double blinking orange |
| Cloning in progress | Solid orange |
| Low battery | Blinking orange |
| Low battery shutdown | Rapid blinking orange |
| Monitor | LED is off |
| Fatal error at power up | Alternating green, orange and green for four seconds |
Task 4
How do I program a Motorola RM Series radio without a computer?
Advanced Configuration Mode is Motorola's front-panel programming mode. It sets frequencies, codes, scramble, maximum channels, call tone, microphone gain, scan and the weather channel — no PC and no cable.
-
Enter Advanced Configuration Mode
Hold PTT and SB1 together for three seconds while turning the radio on. The green LED blinks, the program icon appears, the radio drops into Idle Programming Mode, and the current channel name blinks — that blink is telling you that you can rotate the channel selector knob to pick the channel you want to program.
-
Move through the settings with PTT
Each press of PTT advances to the next programming feature without saving. The left arrow / Button A and right arrow / Button B change the value.
-
Save and exit
Press and hold PTT to save and return to Idle Programming Mode. Press and hold PTT twice to leave Idle Programming Mode. Turning the radio off exits without saving. Then repeat on every radio in the fleet so all of them match.
| What you want to change | How to get there | Notes |
|---|---|---|
| Operating frequency | Select the channel, press PTT until the frequency icon appears, then use the left or right navigation arrow to reach the frequency number you want. | 89 UHF frequencies, all 12.5 kHz. The radio shows the number, not the MHz value. |
| Interference eliminator code | Select the channel, press PTT until the CTCSS/DPL icon appears, then use the navigation arrows to reach the code value. | CTCSS tones and DPL codes, both in the code chart. |
| Scramble code | Select the channel and press PTT until the scramble icon appears and the code blinks, then choose 0, 1, 2 or 3. | 0 turns scramble off, which is the default. Available values depend on CPS programming. |
| Maximum number of channels | Press PTT until the display shows MAX CH and the current count blinks, then change it with the navigation arrows. | Available values depend on how many channels your model supports. |
| Call tone | Press PTT until the display shows TONE and the current setting blinks, then choose 0, 1, 2 or 3. | 0 disables the call tone. Available values depend on CPS programming. |
| Internal microphone gain | Scroll with PTT or Menu until IMIC appears and the setting blinks, then use the navigation arrows. | 1 = low gain, 2 = medium, 3 = high. |
| Accessory microphone gain | Scroll with PTT or Menu until MIC appears and the setting blinks, then use the navigation arrows. | Separate setting from IMIC — this is the one for a headset or speaker mic. |
| Scan list | Press PTT or Menu to reach Scan Programming, rotate the channel selector knob to the channel, then press SB2 to select YES or NO. | If Maximum Channel is set to 1, Scan Programming is disabled and will not appear. |
| Weather channel | Press PTT or Menu to reach Weather Channel Programming, then select YES or NO. | See NOAA weather channels for changing which of the seven frequencies is tuned. |
Can RM radios be programmed with a computer?
Yes. Motorola's Customer Programming Software (CPS) is free, web-based downloadable software, described by Motorola as HTML-based and compatible with any computer browser. You connect the radio through the drop-in charger tray and the CPS programming cable to a USB port.
CPS programs frequencies, PL/DPL codes, bandwidth select, time-out timer, power select, scan list, call tones, scramble and reverse burst. It can also lock front-panel radio programming or restrict individual features from being changed, so a preset configuration cannot be wiped by accident, and it supports a password for profile radio management.
| CPS-only feature | What it does |
|---|---|
| Time-out timer | Sets a fixed maximum length for a transmission, after which the transmission is cut off automatically. |
| Power select | Chooses high or low transmit power per frequency, per channel — toggling between 1 W and 2 W. Some frequencies carry an FCC transmit power limit that blocks the higher setting. |
| Bandwidth select | Sets channel spacing where the model allows it. Bandwidth is selectable only on the RMU2043. |
| Reverse burst | Removes the squelch tail noise when carrier detection drops. Select 180 or 240 to match your other radios. |
| VOX sensitivity | Ships at level 0 (off). VOX will not work through an accessory until this is changed from 0. |
Task 5
Motorola RM Series troubleshooting
Start at the top. The first two cover most calls.
Messages aren't being sent or received
Press PTT completely down when transmitting. Confirm all radios share the same channel, frequency, interference eliminator code and scramble code. Recharge, replace or reseat the batteries. Move the radio. And verify the radio is not sitting in scan mode.
I can hear other people's conversations on my channel
Your frequency or interference eliminator code is in use by someone else. Confirm the code is actually set, change frequencies or codes on all your radios, and make sure each radio is on the right frequency and code when transmitting.
The radio won't turn on
The battery is depleted, or the battery is at an extreme temperature. Recharge or replace the Li-Ion battery.
Messages sound scrambled or garbled
Scramble Code may be on. Match the scramble code setting across all your radios.
Audio quality is weak
Settings do not match. Check frequency, code and bandwidth and make sure they are identical on every radio in the fleet.
My talk range is shorter than expected
Steel and concrete structures, heavy foliage, buildings and vehicles all cut range, and wearing the radio close to your body — in a pocket or on a belt — reduces it further. Look for a clear line of sight, move the radio's position on your body, reduce obstructions, or increase power. Motorola notes UHF radios give greater coverage inside industrial and commercial buildings, and that increasing power gives greater signal range and better penetration through obstructions.
Heavy static or interference
Two possibilities that pull in opposite directions: the radios are too close together — Motorola specifies they must be at least five feet apart — or they are too far apart or blocked by obstacles. Change the radio's location.
The drop-in charger LED doesn't light
Improper radio, battery or charger installation. Check that the radio or battery is seated properly, and check that the battery and charger contacts are clean and the charging pin is inserted correctly.
The low battery indicator blinks even with a new battery
Re-do the battery installation — fit the battery tab into the slots at the bottom of the radio, then push the top of the battery down until it clicks.
The battery won't charge in the drop-in charger
Either a charger connection issue or a faulty battery. Check that the drop-in tray charger is properly connected to a compatible power supply, then read the charger LED to see whether the battery itself is reporting a problem.
VOX won't activate
VOX may be set to OFF, or the accessory is not working or not compatible. Make sure the VOX sensitivity level is not set to 0 in CPS — that is the factory default.
Cleaning and care
Clean the exterior with a soft damp cloth only. Don't immerse the radio in water and don't use alcohol or cleaning solutions on it. If a radio does get submerged, turn it off, remove the battery, dry it with a soft cloth, and leave it until it is completely dry before using it again.
Task 6
Cloning settings and restoring factory defaults
Cloning copies a radio profile from a source radio to a target radio. Motorola supports three methods: a multi-unit charger, two single-unit chargers with a radio-to-radio cloning cable, or CPS.
Cloning with the multi-unit charger
Pocket placement matters and is not obvious. Read the MUC pockets left to right with the Motorola logo facing front. The source radio goes in pocket 1 or 4, and the target goes in pocket 2 or 5 — valid pairs are 1&2 or 4&5. Source and target must be the same band type. The MUC does not need to be plugged in to clone.
-
Charge both radios fully
Motorola's cloning troubleshooting starts here, so it is worth doing first rather than after a failed attempt.
-
Seat the target radio
Turn on the target radio and set it into its MUC pocket.
-
Put the source radio into cloning mode
Hold PTT and SB2 together for three seconds while turning it on. A tone sounds. Then place it in its paired pocket.
-
Press and release SB1
A voice announcement tells you whether the clone succeeded or failed. Turn the radio off and back on to exit cloning mode.
Cloning with two single-unit chargers and a cloning cable
- Turn the radio off and unplug the cables from the SUCs.
- Plug one mini-USB end of the cloning cable into the first SUC and the other end into the second SUC. During cloning no power reaches the SUCs — the batteries are not charging, only data is moving.
- Turn on the target radio and set it in one of the SUCs.
- Turn on the source radio by pressing PTT and SB2 together.
- Place the source radio in its SUC and hold SB1 for three seconds. A tone confirms the clone has started; a voice announcement reports success or failure. On a display model, the screen shows Cloning, then Pass or Fail.
- Exit by cycling the radio off and on, or by holding PTT.
The cloning cable is part HKKN4028, and Motorola states it is designed to work only with compatible Motorola single-unit chargers — RLN6175 and PMLN6394.
Can I clone between RM Series and RDX Series radios?
Yes. Motorola states the cloning cable supports a mix of RM and RDX Series radios, and that profiles interchange with the RDX Series. For RM-to-RM cloning the cable switch goes in the cloning or legacy position; for RM-to-RDX the switch goes in the legacy position and you use a USB converter to the RDX single unit charger. Motorola also notes RDX Series audio accessories can be reused with RM Series radios.
Cloning failed. What now?
Motorola's checklist before retrying:
- Both batteries fully charged.
- Cloning cable connected properly at both SUCs.
- Battery seated properly on the radio.
- No debris in the charging tray or on the radio contacts.
- Target radio is turned on.
- Source radio is actually in cloning mode.
- Both radios are the same frequency band, same region, and similar transmit power.
Hidden power-on settings
Several RM Series settings aren't in a menu at all — they're toggled by holding a button combination while the radio powers up. Keep this list somewhere; it is the answer to most "how do I turn that off" questions.
| What you want to do | Hold while turning the radio on | Default |
|---|---|---|
| Factory reset Returns every radio feature to its default setting |
PTT + SB1 + SB2, until you hear a tone | — |
| Enter Advanced Configuration Mode | PTT + SB1, three seconds | — |
| Enable iVOX Hands-free through the radio's own microphone |
PTT | Off |
| Voice prompt in User mode on/off The spoken channel announcements |
SB1 | On |
| Keypad sounds on/off Silences the beep on button presses |
SB2, until you hear a tone | On |
| Power up tone mode on/off | SB1 + SB2, two to three seconds | On |
| Turn on the source radio for cloning | PTT + SB2, three seconds | — |
Task 7
How do scan, VOX and the NOAA weather channel work?
Three features that are set up once and then mostly forgotten — and three of the most common support questions on the RM Series.
Scanning
Scan monitors your other channels for conversations. When the radio picks up a transmission it stops scanning and parks on that channel so you can listen and reply without turning the knob. Once activity on that channel stops, the radio waits five seconds before it resumes scanning.
- Start or stop scanning: press SB1 or SB2, whichever is programmed for scan. The LED blinks red while scanning.
- Auto scan: if enabled, the radio scans on its own with no button press.
- Talking while scanning: pressing PTT during a scan transmits on the channel that was selected before scan started. If nothing is transmitted within five seconds, scanning resumes.
- Scanning without codes: set the code for those channels to 0 in the CTCSS/DPL programming selection mode.
One limitation to plan around: while the radio is parked on an active channel, you will not hear traffic on the other channels.
VOX and iVOX hands-free operation
Two related features with an important difference: VOX is voice-activated transmit through a VOX-capable audio accessory, and iVOX is voice-activated transmit through the radio's own internal microphone, no accessory required.
Setting up VOX with an accessory. First, the prerequisite people miss: the factory default VOX sensitivity level is OFF (level 0), and the level has to be changed from 0 using CPS before VOX will do anything.
- Turn the radio off.
- Open the accessory cover and insert the audio accessory plug into the accessory port.
- Turn the radio on. The LED blinks red twice.
- Lower the volume before putting the accessory near your ear.
- Speak into the accessory microphone to transmit.
Setting up iVOX with no accessory. Press and hold PTT while turning the radio on. The VOX icon blinks. Pressing PTT temporarily disables iVOX; pressing PTT again turns it back on. Expect a short delay between when you start talking and when the radio actually transmits, so pause briefly before your first word.
Changing sensitivity. Press the Menu button. If iVOX is on, the display shows I VOX and the current level; if an accessory is connected and VOX is on, it shows VOX and the level. Change it with the left and right navigation buttons, then press Menu to save. Turning the radio off exits without saving.
| Level | Sensitivity |
|---|---|
| 0 | Off (VOX accessories only) |
| 1 | Low |
| 2 | Medium — default for VOX |
| 3 | High — default for iVOX |
NOAA weather channels and weather alerts
NOAA Weather Radio All Hazards is a nationwide network broadcasting continuous weather information from the nearest National Weather Service office, 24 hours a day, seven days a week. Working with the FCC's Emergency Alert System, it also carries warning and post-event information for natural disasters, environmental incidents such as chemical spills, and public safety emergencies including AMBER alerts and 911 outages. Motorola describes the network as roughly 1,000 transmitters covering all 50 states, adjacent coastal waters, Puerto Rico, the US Virgin Islands and US Pacific Territories.
Channel position 8 on every RM Series radio with a channel selector knob is configured at the factory for NOAA Weather Radio. It can be disabled or moved to another channel position through CPS or in Advanced Configuration Mode. When a NOAA channel is selected, the radio announces the channel and the weather frequency number — for example, "Channel 8: Weather 1." That weather number tells you which of the seven national frequencies is currently tuned.
To change the weather frequency, go into Weather Channel Programming mode: press SB2 to reach the Weather menu, then use SB1 to toggle up and SB2 to toggle down. PTT acts as the menu button to move on to the channel menu or the weather alert menu.
| Weather | MHz | Weather | MHz |
|---|---|---|---|
| 1 | 162.400 | 5 | 162.500 |
| 2 | 162.425 | 6 | 162.525 |
| 3 | 162.450 | 7 | 162.550 |
| 4 | 162.475 |
How the weather alert feature works
With Weather Alert enabled, the radio mutes the routine daily weather broadcast, so you can switch to a normal two-way channel and work as usual. The radio keeps monitoring the NOAA frequency for a Warning Alarm Tone from the National Weather Service. When it detects one, the radio unmutes and plays the message — including when the radio is sitting on a two-way channel at the time.
Pressing PTT or changing channels while an alert is playing exits weather alert mode and returns the radio to normal operation. Motorola notes that using the weather alert feature does affect normal battery life.
Task 8
How long does the RM Series battery last, and how do I charge it?
Motorola rates average battery life on a 5/5/90 duty cycle — 5% of the time transmitting, 5% receiving and 90% on standby — at up to 15 hours with battery save on, or up to 12 hours without it. Battery Save is enabled by default from the factory.
What that duty cycle means in practice
5/5/90 is a realistic pattern for most shifts. A supervisor who transmits constantly will see less; a radio that mostly listens will see more. Running the weather alert feature also draws on normal battery life.
Charging
Turn the radio off before charging. Place the charger on a flat surface, insert the power cord plug — the charger port on the back of a single-unit charger, or the dual pin connector at the bottom of a multi-unit charger — then plug the power cord into an AC outlet and drop the radio in.
| Charging solution | Standard lithium-ion battery |
|---|---|
| Standard power supply | ≤ 4.5 hours |
| Rapid power supply | ≤ 2.5 hours |
Reading the battery meter
| 3 bars | 100%–70% remaining |
|---|---|
| 2 bars | 70%–30% remaining |
| 1 bar | 35%–0% remaining (≤10% when blinking) |
What the charger lights mean
| Charger LED | Status |
|---|---|
| Green for about one second | Power on |
| Steady red | Charging |
| Steady green | Charged |
| Fast blinking red | Error — reposition the battery pack to clear it |
| Slowly blinking amber | Standby — battery too warm, too cold, or wrong power voltage |
| Blink red once | Battery level low |
| Blink amber twice | Battery level medium |
| Blink green three times | Battery level high |
| No LED indication | Battery is depleted |
Getting the longest life out of an RM Series battery
Motorola's guidance is specific. Battery life is driven mainly by overcharging and by how deeply the battery is discharged each cycle — a battery repeatedly run to 100% discharge several times a day lasts fewer cycles than one discharged to 50% per day, and a battery with minimal overcharge averaging 25% discharge lasts longer still.
Keep the battery near 77°F (25°C) where you can. Charging a cold battery (below 50°F / 10°C) can cause electrolyte leakage and eventual failure. Charging a hot battery (above 95°F / 35°C) reduces discharge capacity and hurts radio performance.
Motorola batteries are designed to be used with Motorola chargers and vice versa. Charging with non-Motorola equipment can damage the battery and voids the battery warranty. Lithium-ion batteries are also recyclable, and in many US states and other countries they cannot legally go in landfills or incinerators.
Reference
Full Motorola RM Series specifications
Straight from Motorola's product spec sheet. Useful when a facilities manager or an RF consultant asks exactly what is transmitting in their building.
General
| Audio output | 1500 mW |
|---|---|
| Channel bandwidth | 12.5 kHz (RMU2043: 12.5/25 kHz; RMM2050: 11.25 or 20.0 kHz, frequency dependent) |
| Dimensions | 4.5 in H x 2.2 in W x 1.6 in D (115.6 x 57.6 x 40.5 mm), with either battery |
| Weight, standard Li-Ion battery | RMU2040 / RMU2080 / RMU2043 / RMM2050: 8.6 oz (244 g) · RMU2080d: 9 oz (256 g) · RMV2080: 8.9 oz (252 g) |
| Weight, high-capacity Li-Ion battery | RMU2040 / RMU2080 / RMU2043 / RMM2050: 8.7 oz (247 g) · RMU2080d: 9.1 oz (259 g) · RMV2080: 9.0 oz (255 g) |
| Battery voltage | 3.7 V Li-Ion |
| Average battery life @ 5/5/90 | Up to 15 hours with battery save on, up to 12 hours without |
| Antenna | Non-removable on the RMU2080d |
Transmitter
| RF output, high (conducted) | 2 watts |
|---|---|
| RF output, low (conducted) | 1 watt |
| Frequency stability | < 1.5 ppm |
| Spurs and harmonics | < −45 dBc |
| FM hum and noise | −36 dBm for f < 1 GHz; −30 dBm for f > 1 GHz |
| Modulation limiting | ±2.5 kHz @ 12.5 kHz; ±5.0 kHz @ 25.0 kHz |
| Adjacent channel power | 70 dBc |
| Audio frequency response (0.3–3.0 kHz) | +1 to −3 dB |
| Audio distortion | < 2% |
Receiver
| Sensitivity (12 dB SINAD) | −122 dBm (0.18 µV) |
|---|---|
| Adjacent channel selectivity | 70 dB @ 12.5 kHz; 75 dB @ 25 kHz |
| Intermodulation rejection | 70 dB |
| Spurious response rejection (blocking 1 MHz) | 90 dB |
| Audio distortion | < 5% |
| CSQ hum and noise @ 12.5 kHz | −50 dB |
| PL hum and noise @ 12.5 kHz | −50 dB |
| DPL hum and noise @ 12.5 kHz | −45 dB |
| Spurious emissions (< 1 GHz) | < −54 dBm |
| Spurious emissions (> 1 GHz) | < −52 dBm |
| Audio output @ < 5% distortion | 1.5 W @ 8 ohms |
How durable is the RM Series?
Motorola specifies the RM Series against Military Standard 810 C, D, E, F and G, and describes those standards as the starting point rather than the target. On top of the MIL-STD methods, the radios go through Motorola's Accelerated Life Testing, a laboratory program Motorola says simulates up to five years of field use:
- Blowing rain — steady rainfall and wind for 30 minutes on every surface
- Vibration — up to 9 hours, simulating what a radio takes while being carried
- Salt fog — 48 hours of exposure
- Blowing dust — 6 hours on all surfaces
- Temperature — multiple hours at storage temperatures from −67°F up to 160°F
Motorola also states that the RM Series carries an antimicrobial coating intended to help prevent the growth of mold and germs on the surface of the radio — relevant if radios get passed between shifts.
Environmental
| Operating temperature | −30°C to +60°C |
|---|---|
| Sealing | IP55 |
| Shock and vibration | Polycarbonate housing passes EIA 603 |
| Dust and humidity | Satisfied EIA 603 |
MIL-STD-810 methods and procedures
| Standard | MIL 810 C | MIL 810 D | MIL 810 E | MIL 810 F | MIL 810 G |
|---|---|---|---|---|---|
| Low pressure | 500.1 / Proc 1 | 500.2 / Proc 2 | 500.3 / Proc 2 | 500.4 / Proc 1 | 500.5 / Proc 1 |
| High temperature | 501.1 / Proc 1,2 | 501.2 / Proc 1,2 | 501.3 / Proc 1,2 | 501.4 / Proc 1,2 | 501.5 / Proc 1,2 |
| Low temperature | 502.1 / Proc 1 | 502.2 / Proc 1,2 | 502.3 / Proc 1,2 | 501.4 / Proc 1,2 | 501.5 / Proc 1,2 |
| Temperature shock | 503.1 / Proc 1 | 503.2 / Proc 1 | 503.3 / Proc 1 | 503.4 / Proc 1 | 503.5 / Proc 1 |
| Solar radiation | 505.1 / Proc 1 | 505.2 / Proc 1 | 505.3 / Proc 1 | 505.4 / Proc 1 | 505.5 / Proc 1 |
| Rain | 506.1 / Proc 1,2 | 506.2 / Proc 1,2 | 506.3 / Proc 1,2 | 506.4 / Proc 1 | 506.5 / Proc 1 |
| Humidity | 507.1 / Proc 2 | 507.2 / Proc 2,3 | 507.3 / Proc 2,3 | 507.4 / Proc 3 | 507.5 / Proc 3 |
| Dust | 510.1 / Proc 1 | 510.2 / Proc 1 | 510.3 / Proc 1 | 510.4 / Proc 1 | 510.5 / Proc 1 |
| Vibration | 514.2 / Proc 8,10 | 514.3 / Proc 1 | 514.4 / Proc 1 | 514.5 / Proc 1 | 514.6 / Proc 1 |
| Shock | 516.2 / Proc 1,2,5 | 516.3 / Proc 1,4 | 516.4 / Proc 1,4 | 516.5 / Proc 1 | 516.5 / Proc 1 |
Task 9
Frequency and interference eliminator code charts
The radio shows a frequency number, not the actual megahertz value. This is the full mapping from the user guide — what you need when matching RM radios to an existing fleet, filing an FCC license application, or answering a facilities manager who wants to know exactly what's transmitting in their building. Every RM UHF frequency is 12.5 kHz narrowband.
All 89 RM Series UHF frequencies
| No. | MHz | No. | MHz | No. | MHz |
|---|---|---|---|---|---|
| 1 | 464.5000 | 31 | 464.5125 | 61 | 467.1875 |
| 2 | 464.5500 | 32 | 464.5375 | 62 | 467.4625 |
| 3 | 467.7625 | 33 | 464.5625 | 63 | 467.4875 |
| 4 | 467.8125 | 34 | 466.0375 | 64 | 467.5125 |
| 5 | 467.8500 | 35 | 466.0625 | 65 | 451.1875 |
| 6 | 467.8750 | 36 | 466.0875 | 66 | 451.2375 |
| 7 | 467.9000 | 37 | 466.1125 | 67 | 451.2875 |
| 8 | 467.9250 | 38 | 466.1375 | 68 | 451.3375 |
| 9 | 461.0375 | 39 | 466.1625 | 69 | 451.4375 |
| 10 | 461.0625 | 40 | 466.1875 | 70 | 451.5375 |
| 11 | 461.0875 | 41 | 466.2125 | 71 | 451.6375 |
| 12 | 461.1125 | 42 | 466.2375 | 72 | 452.3125 |
| 13 | 461.1375 | 43 | 466.2625 | 73 | 452.5375 |
| 14 | 461.1625 | 44 | 466.2875 | 74 | 452.4125 |
| 15 | 461.1875 | 45 | 466.3125 | 75 | 452.5125 |
| 16 | 461.2125 | 46 | 466.3375 | 76 | 452.7625 |
| 17 | 461.2375 | 47 | 466.3625 | 77 | 452.8625 |
| 18 | 461.2625 | 48 | 467.7875 | 78 | 456.1875 |
| 19 | 461.2875 | 49 | 467.8375 | 79 | 456.2375 |
| 20 | 461.3125 | 50 | 467.8625 | 80 | 456.2875 |
| 21 | 461.3375 | 51 | 467.8875 | 81 | 456.3375 |
| 22 | 461.3625 | 52 | 467.9125 | 82 | 456.4375 |
| 23 | 462.7625 | 53 | 469.4875 | 83 | 456.5375 |
| 24 | 462.7875 | 54 | 469.5125 | 84 | 456.6375 |
| 25 | 462.8125 | 55 | 469.5375 | 85 | 457.3125 |
| 26 | 462.8375 | 56 | 469.5625 | 86 | 457.4125 |
| 27 | 462.8625 | 57 | 462.1875 | 87 | 457.5125 |
| 28 | 462.8875 | 58 | 462.4625 | 88 | 457.7625 |
| 29 | 462.9125 | 59 | 462.4875 | 89 | 457.8625 |
| 30 | 464.4875 | 60 | 462.5125 |
RM Series default channel frequencies
This is the factory configuration for the 8-channel UHF radios. Every channel ships on code number 1, which is 67.0 Hz, at 12.5 kHz bandwidth.
| Channel | Frequency no. | Frequency (MHz) | Code |
|---|---|---|---|
| 1 | 2 | 464.5500 | 1 — 67.0 Hz |
| 2 | 8 | 467.9250 | 1 — 67.0 Hz |
| 3 | 5 | 467.8500 | 1 — 67.0 Hz |
| 4 | 6 | 467.8750 | 1 — 67.0 Hz |
| 5 | 10 | 461.0625 | 1 — 67.0 Hz |
| 6 | 12 | 461.1125 | 1 — 67.0 Hz |
| 7 | 14 | 461.1625 | 1 — 67.0 Hz |
| 8 | Weather channel | 162.4000 | 1 — 67.0 Hz |
What interference eliminator codes actually do
Also known as privacy codes, PL codes, CTCSS, DPL or DCS, these are a filter, not encryption. Your radio still transmits on the same frequency as everyone else; the code simply tells your radio to stay silent unless the incoming transmission carries a matching sub-audible tone or digital code.
It keeps another business on the same frequency out of your earpiece, but it does not make your conversation private. Two radios have to match on both frequency and code to hear each other.
Analog CTCSS codes (in Hz)
| Code | Hz | Code | Hz | Code | Hz |
|---|---|---|---|---|---|
| 1 | 67.0 | 14 | 107.2 | 27 | 167.9 |
| 2 | 71.9 | 15 | 110.9 | 28 | 173.8 |
| 3 | 74.4 | 16 | 114.8 | 29 | 179.9 |
| 4 | 77.0 | 17 | 118.8 | 30 | 186.2 |
| 5 | 79.7 | 18 | 123.0 | 31 | 192.8 |
| 6 | 82.5 | 19 | 127.3 | 32 | 203.5 |
| 7 | 85.4 | 20 | 131.8 | 33 | 210.7 |
| 8 | 88.5 | 21 | 136.5 | 34 | 218.1 |
| 9 | 91.5 | 22 | 141.3 | 35 | 225.7 |
| 10 | 94.8 | 23 | 146.2 | 36 | 233.6 |
| 11 | 97.4 | 24 | 151.4 | 37 | 241.8 |
| 12 | 100.0 | 25 | 156.7 | 38 | 250.3 |
| 13 | 103.5 | 26 | 162.2 | 122 | 69.3 |
Digital DPL codes
| Code | DPL | Code | DPL | Code | DPL |
|---|---|---|---|---|---|
| 39 | 023 | 68 | 205 | 96 | 464 |
| 40 | 025 | 69 | 223 | 97 | 465 |
| 41 | 026 | 70 | 226 | 98 | 466 |
| 42 | 031 | 71 | 243 | 99 | 503 |
| 43 | 032 | 72 | 244 | 100 | 506 |
| 44 | 043 | 73 | 245 | 101 | 516 |
| 45 | 047 | 74 | 251 | 102 | 532 |
| 46 | 051 | 75 | 261 | 103 | 546 |
| 47 | 054 | 76 | 263 | 104 | 565 |
| 48 | 065 | 77 | 265 | 105 | 606 |
| 49 | 071 | 78 | 271 | 106 | 612 |
| 50 | 072 | 79 | 306 | 107 | 624 |
| 51 | 073 | 80 | 311 | 108 | 627 |
| 52 | 074 | 81 | 315 | 109 | 631 |
| 53 | 114 | 82 | 331 | 110 | 632 |
| 54 | 115 | 83 | 343 | 111 | 654 |
| 55 | 116 | 84 | 346 | 112 | 662 |
| 56 | 125 | 85 | 351 | 113 | 664 |
| 57 | 131 | 86 | 364 | 114 | 703 |
| 58 | 132 | 87 | 365 | 115 | 712 |
| 59 | 134 | 88 | 371 | 116 | 723 |
| 60 | 143 | 89 | 411 | 117 | 731 |
| 61 | 152 | 90 | 412 | 118 | 732 |
| 62 | 155 | 91 | 413 | 119 | 734 |
| 63 | 156 | 92 | 423 | 120 | 743 |
| 64 | 162 | 93 | 431 | 121 | 754 |
| 65 | 165 | 94 | 432 | 123 | 654 |
| 66 | 172 | 95 | 445 | ||
| 67 | 174 |
The rest of the code range
- Codes 124–129 — customized PL
- Codes 130–213 — inverted DPL, mapping in order to standard DPL codes 39 through 123 (so code 130 is inverted DPL 39, code 131 is inverted DPL 40, and so on up to code 213 = inverted DPL 123)
- Codes 214–219 — customized DPL
Also useful
Accessories and FCC licensing
Every accessory below works across the RM Series, so a mixed fleet only needs one accessory inventory. These are the part numbers in the Motorola documentation — useful when reordering something that arrived with the original radios years ago.
Remote speaker mic
Clear audio in noise without unclipping the radio.
PMNN4434Standard Li-Ion battery
Spare or replacement battery.
PMLN6384Multi-unit charger
Charges six radios or batteries. Also does cloning.
HKKN4027CPS programming cable
Required for the CPS-only features.
Motorola's authorized accessory list
Motorola states that using accessories it has not recommended can result in fire, electric shock or injury, and that using non-Motorola charging equipment voids the battery warranty.
| Part number | Description |
|---|---|
| HKLN4599 | Earpiece with PTT, mic, slim plug, PVC free |
| HKLN4601 | Dual-pin surveillance kit with PTT, slim plug, PVC free |
| HKLN4604 | Swivel earpiece with PTT, slim plug, PVC free |
| HKLN4606 | Remote speaker mic with PTT, slim plug, PVC free |
| 53866 | Earbud with PTT, mic, PVC free |
| PMNN4434_R | Standard Li-Ion battery |
| PMNN4453 | High-capacity Li-Ion battery |
| HKLN4510 | Swivel holster |
| HKKN4027 | CPS programming cable |
| HKKN4028 | Radio-to-radio cloning cable |
| PMLN6384 | Multi-unit charger kit (North America) |
| PMLN6394 | Standard drop-in tray charger |
| RLN6175 | Compatible single-unit charger for cloning |
| 82012694001 | Customer Programming Software (CPS) |
What comes in the box
- RM Series radio
- Lithium-ion battery
- Swivel holster
- Drop-in tray charger and power supply
- Quick reference guide, warranty card, and the Product Safety & RF Exposure booklet
What is the Motorola RM Series warranty?
| Two-way radio | Two years from date of purchase by the first purchaser |
|---|---|
| Business two-way radio accessories | One year from date of purchase by the first purchaser |
Batteries are covered only where fully charged capacity falls below 80% of rated capacity, or where the battery leaks. The warranty runs to the first consumer purchaser and is not transferable. Motorola excludes normal wear and tear, abuse and misuse, liquid or extreme-condition damage, use of non-Motorola branded or certified products and accessories, unauthorized service or modification, and products with removed or altered serial numbers or broken seals.
Do Motorola RM Series radios require an FCC license?
Technically yes — but a license is not required to purchase radios. The RM Series complies with FCC Parts 90 and 15, and Motorola states plainly that to transmit on these frequencies you are required to hold a license issued by the FCC. That licensing requirement is what makes the frequencies business-exclusive.
Applications are filed on FCC Form 601 with Schedules D and H, plus Remittance Form 159; the FCC bundles the forms and instructions as document 000601. Before you fill out the application you have to decide which frequency you will operate on — which is what the frequency chart above is for. Motorola's published contacts are 1-888-CALL-FCC (1-888-225-5322) or fcc.gov for licensing questions, and Motorola Solutions Product Services at 1-800-448-6686 for frequency questions.
Two other regulatory points from the manual worth knowing: modifications not expressly approved by Motorola can void your authority to operate the radio, and transmitter adjustments must be made by or supervised by someone certified as technically qualified for private land mobile transmitter maintenance. Using the radio outside the country it was distributed for is subject to that country's regulations and may be prohibited.
Frequently asked
Motorola RM Series FAQ
What is the part number for the Motorola RM Series manual?
The current RM Series Two-Way Radio User Guide is Motorola part number 68012009073-BE, dated February 2025. That number is printed on the cover and in the header of every page of the PDF.
What's the difference between the RMU2080 and the RMU2080d?
The "d" is for display. Both are UHF 450–470 MHz, 8 channels, 2 watts. The RMU2080d adds an LCD screen showing channel number, battery level, signal strength and feature icons, and it is slightly heavier — 9 oz versus 8.6 oz with the standard battery.
How many watts is a Motorola RM Series radio?
2 watts on high power and 1 watt on low, conducted, across the line. Power Select lets you choose high or low per frequency in each channel through CPS. Some frequencies carry an FCC transmit power limit that prevents setting them to the higher level.
How far will a Motorola RM Series radio reach?
Motorola rates the 2-watt UHF models (RMU2040, RMU2080, RMU2080d) at up to 250,000 square feet or up to 20 floors, and the VHF RMV2080 and MURS RMM2050 at up to 220,000 square feet or 13 floors. Motorola qualifies all of these: coverage varies based on terrain, conditions and the radio model used.
Is the Motorola RM Series waterproof?
No — it is rated for dust and water ingress protection, not immersion. Motorola's spec sheet lists sealing as IP55, while the brochure describes the line as meeting IP54/55. Either way, the user guide is explicit: do not immerse the radio in water, and if it does get submerged, turn it off, remove the battery, dry it with a soft cloth, and do not use it until it is completely dry.
How do I factory reset a Motorola RM Series radio?
Hold PTT, SB1 and SB2 at the same time while turning the radio on, until you hear a tone. That returns every radio feature to its default setting.
How do I turn off the beeping on a Motorola RM Series radio?
There are two separate sounds. Keypad tones are toggled by holding SB2 while turning the radio on until you hear a tone. The power-up tone and voice announcement is toggled by holding SB1 and SB2 together for two to three seconds while powering up. The voice prompt in User mode is toggled separately by holding SB1 while turning the radio on — it is on by default.
Which channel is the weather channel on an RM Series radio?
Channel 8, on every RM Series radio with a channel selector knob, is set at the factory for NOAA Weather Radio. It can be disabled or moved to a different channel position through CPS or in Advanced Configuration Mode.
Do I need software to program a Motorola RM Series radio?
No. Advanced Configuration Mode sets frequencies, codes, scramble, maximum channels, call tone, mic gain, scan and the weather channel from the radio's own front panel — enter it by holding PTT and SB1 for three seconds while turning the radio on. CPS is required only for the features that are not exposed on the front panel: bandwidth select, time-out timer, power select, reverse burst, VOX sensitivity, and locking the front panel so a configuration cannot be changed.
Can RM Series radios talk to RDX Series radios?
Motorola states that profiles interchange between the RM and RDX Series, that the radio-to-radio cloning cable supports a mix of RM and RDX radios, and that RDX Series audio accessories can be reused on RM Series radios. For any two radios to communicate they still have to be set to the same frequency and the same interference eliminator code.
Why can I hear another company on my radio?
You are sharing a frequency with them — business frequencies are not exclusive. Confirm your interference eliminator code is actually set, then change the frequency or the code across your whole fleet. Motorola's own troubleshooting guidance is exactly this: confirm the code is set, change frequencies or codes on all radios, and make sure each radio is on the right frequency and code when transmitting.
What's the difference between a two-way radio and a walkie-talkie?
In everyday use they mean the same thing — a handheld radio you push a button to talk on. The practical distinction is licensing and build: the RM Series is a business two-way radio operating under FCC Part 90 on licensed business frequencies at 2 watts, built to MIL-STD-810 C through G. Consumer walkie-talkies sold in retail stores operate on license-free FRS channels at much lower power and are not built to those standards.
Getting help with your RM Series radios
Tech Wholesale has been an authorized Motorola Solutions dealer since 1997, and the RM Series has been part of that catalog for most of it. If you're adding radios to an existing fleet and don't know what frequencies you're currently on, or you're not sure which RM model fits your building, talk to us before you order. We'll program the radios to matching frequencies and codes before they ship, and that conversation prevents the most common and most expensive mistake we see: buying on price alone and discovering the coverage gaps after deployment.
Every specification, chart, part number and procedure on this page is taken from the Motorola RM Series user guide, brochure and product spec sheet.