

Welcome to your go-to support hub for Motorola CLS Series two-way radios!
Explore our user manuals, easy setup guides, troubleshooting tips, and accessory recommendations below to keep your radios working perfectly and your team seamlessly connected.
What are you trying to do?
Pick the task and go straight to it.
Start here
The three things people call us about
If you are here for one specific thing, it is almost always one of these.
How do I get into programming mode?
Hold Push to Talk and MON together for three seconds while turning the radio on. The radio beeps, PROG appears, and the channel number blinks. Full programming steps →
The radio will not charge.
Swap in a known-good charged battery first. If that fixes it, the battery was the fault. If it does not, the radio may need replacing or submitting for warranty. More troubleshooting →
Our radios cannot hear each other.
The frequency and the interference eliminator code must match on every radio, and on the CLS1410 so must the channel. Check the code before you check anything else. Frequency and code charts →
Task 1
Where can I download the CLS1110 or CLS1410 manual?
All three documents cover both models. Each opens in a new tab so you keep your place here.
Manual CLS Series User's Guide Controls, charging, programming, scanning, VOX, cloning, troubleshooting, the full frequency and code charts, and warranty terms. ↗ Specs CLS Series Product Spec Sheet Transmitter and receiver specifications, military standard test methods, environmental ratings, FCC and IC designations. ↗ Brochure CLS Series Brochure Feature overview, what's in the box, accessory list and typical business use cases. ↗ ↑ Back to tasksTask 2
What do the buttons and display icons do?
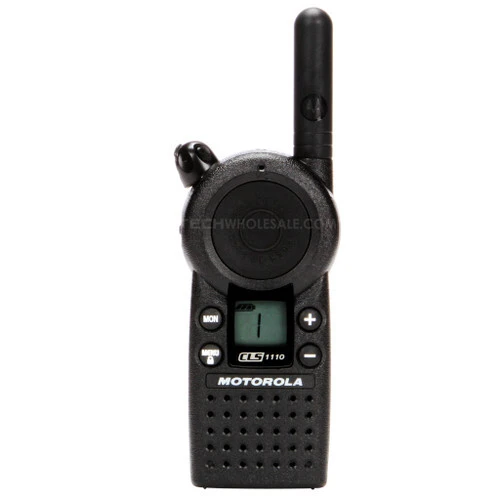
The CLS has six controls. Everything on the radio is done with these.
| Control | What it does |
|---|---|
| Volume knob (top) | Turns the radio on and off, and adjusts volume. Clockwise for on and louder, counterclockwise for off and quieter. |
| Push to Talk (large side button) | Transmits while held. Also exits a menu or programming mode. |
| Call button (bell icon, side) | Transmits your selected call tone to alert the group before you speak. |
| MON (monitor) | Hold to listen to the raw frequency and check whether the channel is clear. On the CLS1410, a short press starts and stops scan. |
| MENU | Scrolls through menu settings. Hold for three seconds to lock or unlock the keypad. |
| + and − | Change channels on the CLS1410, and change values inside menus and programming mode. |
Reading the display
The LCD is small and every icon earns its place. Reading left to right and top to bottom, you'll see the signal strength and channel busy indicator, the battery meter, the current channel number in large type, the interference eliminator code indicator, the programming mode indicator, and the scan indicator on the CLS1410.
On the right side of the display you'll find the VibraCall alert indicator, the frequency and interference eliminator code readout, the keypad lock icon, the frequency indicator, and the microphone gain and VOX indicators on the CLS1410.
The light on top tells you as much as the screen
- Blinks once every three seconds — the radio is on and idle.
- Blinks once per second — there is activity on your frequency.
- Solid red — you are transmitting.
When your radio is actually receiving a transmission that matches both your frequency and your code, the display shows a signal strength reading from 1 (weakest) to 6 (strongest). That is the fastest way to tell someone is drifting out of range before they drop off entirely.
Task 3
How do I program a Motorola CLS1110 or CLS1410?
Programming mode changes the channel, operating frequency, interference eliminator code, call tone, microphone gain and — on the CLS1410 — the number of available channels and the scan list. No computer or cable required for any of it.
-
Enter programming mode
Press and hold Push to Talk and MON together for three seconds while turning the radio on. The radio beeps, PROG appears on the display, the channel number blinks, and the frequency (FREQ) and code (CODE) readouts alternate.
-
Move through the settings with MON
Each press of MON advances you to the next setting in the sequence. The + and − buttons change the value.
-
Save and exit
Press and hold Push to Talk at any point to save and exit. Then repeat on every radio in the fleet so all of them match.
| What you want to change | How to get there | Models |
|---|---|---|
| Channel | The first setting after you enter programming mode. The channel number blinks; press + or − to select it. | CLS1410 only |
| Operating frequency | Press MON until FREQ displays and the frequency number blinks, then press + or − to pick one of the 56 frequencies. | Both |
| Interference eliminator code | Press MON until CODE displays and the code number blinks, then press + or − to select a code from 0–121. | Both |
| Number of available channels | Press MON until the channel count displays and blinks, then press + or −. Settings for channels you hide are retained. | CLS1410 only |
| Call tone / VibraCall | Press MON until the call tone setting displays, then press + or − to hear and choose a tone. Tone 4 turns VibraCall on. | Both (VibraCall CLS1410 only) |
| Microphone gain | Press MON until the microphone gain setting displays, then press + or −: 1 is high sensitivity for quiet rooms, 2 is medium (the default), 3 is low for loud environments. | Both |
| Scan list | Press MON until the scan list displays with the channel number blinking, select the channel with + or −, then press MON to include or exclude it. | CLS1410 only |
Can CLS radios be programmed with a computer?
Yes. Everything above can be done by hand on the radio itself, which is how most small fleets are set up. For larger deployments, Motorola's Customer Programming Software plus the programming cable lets you configure frequencies, codes and scan lists on a PC and push identical settings across every radio.
If you're deploying more than a handful of radios, the faster route for most teams is cloning through the multi-unit charger — no software required.
Task 4
Motorola CLS troubleshooting
Start at the top. The first two cover most calls.
Message not received
Confirm every radio has the same channel, frequency and interference eliminator code. Verify the radio isn't sitting in scan mode (CLS1410). Move location — obstructions and vehicle interiors cut range.
Hearing other conversations on your channel
Another business is on your frequency. Change the frequency, or the code, on all of your radios.
No power
Recharge or replace the lithium-ion battery.
Message not transmitted
Make sure Push to Talk is fully pressed. Verify the transmit light comes on while you speak. Recharge, replace or reseat the battery.
Poor audio quality
Bandwidth mismatch. Other radios communicating with CLS radios should be set to 12.5 kHz where possible.
Limited talk range
Steel and concrete structures, heavy foliage and vehicles all reduce range. Wearing the radio in a pocket or on a belt reduces it further — move the radio and look for clearer line of sight.
Heavy static or interference
The radios are too close together — they need to be at least five feet apart. Or they're too far apart, or obstructed.
Keypad locked
Hold MENU for three seconds to unlock.
Low battery warning with a new battery
Verify the radio is set to the correct battery type. Extreme operating temperatures also shorten battery life.
Charger light doesn't come on
Reseat the radio or battery. Clean the battery and charger contacts. Check that the transformer's charging pin is fully inserted into the drop-in charger.
Can't activate VOX (CLS1410)
The feature isn't set, sensitivity is set to off, or the accessory doesn't support VOX.
Can't enter programming mode
Unplug any audio accessory and try again.
Cleaning and care
Clean the exterior with a soft damp cloth only. Don't immerse the radio in water and don't use alcohol or cleaning solutions on it. If a radio does get submerged, turn it off immediately, remove the battery, dry it with a soft cloth, and leave it until it is completely dry before using it again.
Task 5
Cloning settings and restoring factory defaults
Cloning copies a source radio's settings to a target radio using the 56531 multi-unit charger. It is the fastest way to bring new radios into an existing fleet — no cable, no software, and no power required, though both radios need charged batteries.
-
Put the source radio into programming mode
Hold Push to Talk and MON for three seconds while turning it on. The radio beeps and displays PROG.
-
Seat both radios in paired pockets
Place the source radio in one of the charging pockets. Turn the target radio on and place it in the pocket paired with the source radio's pocket. The six pockets form three pairs, indicated by the three pairs of charging status LEDs.
-
Hold MON on the source radio
It transmits its settings to the target radio. A P (pass) or F (fail) displays on the source radio. On success, the target radio lights up all of its feature icons.
-
Power cycle the target, then repeat or exit
Turn the target radio off and back on before using it. To clone another radio, repeat the seating and MON steps. To exit, hold Push to Talk on the source radio until PROG disappears.
Restoring factory defaults
If a radio has been passed around long enough that nobody knows what's on it, resetting is usually the quickest answer. Turn the radio on while holding Push to Talk and MON for three seconds.
The manual lists this same button combination for entering programming mode, so watch the display: if you land on the blinking PROG screen, you're in programming mode rather than reset. Either way, the table below tells you what a factory-fresh radio should be set to, so you can confirm it by hand in under a minute.
| Setting | CLS1110 default | CLS1410 default |
|---|---|---|
| Channel 1 frequency | Frequency 2 | Frequency 2 |
| Channel 2 frequency | Not available | Frequency 8 |
| Channel 3 frequency | Not available | Frequency 5 |
| Channel 4 frequency | Not available | Frequency 6 |
| Interference eliminator code | 1 | 1 |
| Call tone / VibraCall | Off (0) | Off (0) |
| VOX | Not available | Off (0) |
| Microphone gain | 2 (medium) | 2 (medium) |
Hidden power-on settings
A few settings aren't in the menu at all — they're toggled by holding a button while you turn the radio on. These solve complaints like "the radio beeps every time someone touches it" and "there's a lag before I hear anyone."
| Setting | Hold while turning the radio on | Default |
|---|---|---|
| Keypad tones on/off Silences the beep on every button press |
− | On |
| End-of-transmission tone on/off Sends a tone when you release Push to Talk — the audible equivalent of saying "over" |
+ | Off |
| Battery save mode on/off Turning it off shortens the delay between a transmission arriving and audio playing, at a cost of roughly 20% battery life |
Push to Talk + MON + − | On |
| Restore factory defaults | Push to Talk + MON | — |
Task 6
How do scan, VOX and VibraCall work on the CLS1410?
These three features are the whole difference between the CLS1410 and the CLS1110, beyond channel count.
Scanning — up to four channels
- Press MON briefly to start. The scan icon appears and the radio cycles through the channels.
- When it detects activity it stops there and displays that channel number. You can reply on it by pressing Push to Talk within five seconds — no channel change needed.
- After five seconds of silence, scanning resumes.
- Press MON briefly again to stop.
Two tips make scan usable on a busy floor. Scan advance: if the radio lands on a conversation you don't need, press MON to jump to the next active channel. Nuisance delete: press and hold MON to drop that channel from the scan list temporarily — it returns the next time you use scan.
VOX hands-free operation
VOX lets the CLS1410 transmit when you speak, with no button press, using a compatible audio accessory.
- Turn the radio off, open the accessory cover, plug the accessory firmly into the accessory jack, then turn the radio back on.
- The VOX indicator appears.
- If it's blinking and this is your first setup, set the sensitivity: press MENU until the VOX sensitivity setting displays, then use + or − to choose off, low, medium or high.
- Lower the volume before putting the earpiece in.
To disable VOX, press Push to Talk or remove the accessory. Expect a short delay between when you start speaking and when the radio actually transmits — start with a half-second pause before your first word so the beginning of your sentence isn't clipped.
VibraCall silent alert
Select call tone 4 in programming mode and the radio vibrates briefly when it receives a call tone, provided it hasn't transmitted or received in the last 30 seconds. The VibraCall icon shows on the display when it's active.
It's the reason the CLS1410 turns up so often in hotels, theaters, funeral homes and hospital wings — anywhere a chirping radio in a quiet room is a problem.
Task 7
How long does the CLS battery last, and how do I charge it?
The CLS ships with a rechargeable lithium-ion battery rated at 14 hours on Motorola's 5/5/90 duty cycle — 5% of the time transmitting, 5% receiving and 90% on standby.
What 14 hours means in practice
That duty cycle is a realistic pattern for most retail, restaurant and hotel shifts. A supervisor who transmits constantly will see less; a stockroom radio that mostly listens will see more.
Charging
Place the drop-in charger on a flat surface, plug the power cord into the charger and then into an AC outlet, turn the radio off, and drop it in the front charging pocket. The radio fits in the charger with the holster still on.
- A full charge takes roughly two to six hours, and the radio charges faster switched off than on.
- The charging LED is solid red while charging, solid green when complete.
- The drop-in charger will also charge a spare battery sequentially — the spare doesn't begin charging until the radio's battery is full.
- For battery longevity, avoid leaving a radio on the charger for extended periods after it's already full. Charging over a weekend is fine.
Reading the battery meter
| 3 bars | 100%–85% remaining |
|---|---|
| 2 bars | 85%–25% remaining |
| 1 bar | 25%–10% remaining |
| Blinking | Final 10% |
Task 8
Frequency and interference eliminator code charts
The display shows a frequency number from 1 to 56, not the actual megahertz value. This is the full mapping from the user guide — what you need when matching CLS radios to an existing fleet, filing an FCC license application, or answering a facilities manager who wants to know exactly what's transmitting in their building. Every CLS frequency is 12.5 kHz narrowband.
All 56 CLS frequencies
| No. | MHz | No. | MHz | No. | MHz | No. | MHz |
|---|---|---|---|---|---|---|---|
| 1 | 464.5000 | 15 | 461.1875 | 29 | 462.9125 | 43 | 466.2625 |
| 2 | 464.5500 | 16 | 461.2125 | 30 | 464.4875 | 44 | 466.2875 |
| 3 | 467.7625 | 17 | 461.2375 | 31 | 464.5125 | 45 | 466.3125 |
| 4 | 467.8125 | 18 | 461.2625 | 32 | 464.5375 | 46 | 466.3375 |
| 5 | 467.8500 | 19 | 461.2875 | 33 | 464.5625 | 47 | 466.3625 |
| 6 | 467.8750 | 20 | 461.3125 | 34 | 466.0375 | 48 | 467.7875 |
| 7 | 467.9000 | 21 | 461.3375 | 35 | 466.0625 | 49 | 467.8375 |
| 8 | 467.9250 | 22 | 461.3625 | 36 | 466.0875 | 50 | 467.8625 |
| 9 | 461.0375 | 23 | 462.7625 | 37 | 466.1125 | 51 | 467.8875 |
| 10 | 461.0625 | 24 | 462.7875 | 38 | 466.1375 | 52 | 467.9125 |
| 11 | 461.0875 | 25 | 462.8125 | 39 | 466.1625 | 53 | 469.4875 |
| 12 | 461.1125 | 26 | 462.8375 | 40 | 466.1875 | 54 | 469.5125 |
| 13 | 461.1375 | 27 | 462.8625 | 41 | 466.2125 | 55 | 469.5375 |
| 14 | 461.1625 | 28 | 462.8875 | 42 | 466.2375 | 56 | 469.5625 |
What interference eliminator codes actually do
Also known as privacy codes, PL codes, CTCSS, DPL or DCS, these are a filter, not encryption. Your radio still transmits on the same frequency as everyone else; the code simply tells your radio to stay silent unless the incoming transmission carries a matching sub-audible tone.
It keeps another business on the same frequency out of your earpiece, but it does not make your conversation private. Anyone scanning that frequency without a code set can hear you.
- Code 0 — carrier squelch. Disables filtering and lets you hear everything on the frequency.
- Codes 1–38 — analog CTCSS tones.
- Codes 39–121 — digital DPL codes.
Analog codes 1–38 (CTCSS, in Hz)
| Code | Hz | Code | Hz | Code | Hz | Code | Hz |
|---|---|---|---|---|---|---|---|
| 1 | 67.0 | 11 | 97.4 | 21 | 136.5 | 31 | 192.8 |
| 2 | 71.9 | 12 | 100.0 | 22 | 141.3 | 32 | 203.5 |
| 3 | 74.4 | 13 | 103.5 | 23 | 146.2 | 33 | 210.7 |
| 4 | 77.0 | 14 | 107.2 | 24 | 151.4 | 34 | 218.1 |
| 5 | 79.7 | 15 | 110.9 | 25 | 156.7 | 35 | 225.7 |
| 6 | 82.5 | 16 | 114.8 | 26 | 162.2 | 36 | 233.6 |
| 7 | 85.4 | 17 | 118.8 | 27 | 167.9 | 37 | 241.8 |
| 8 | 88.5 | 18 | 123.0 | 28 | 173.8 | 38 | 250.3 |
| 9 | 91.5 | 19 | 127.3 | 29 | 179.9 | ||
| 10 | 94.8 | 20 | 131.8 | 30 | 186.2 |
Digital codes 39–121 (DPL)
| Code | DPL | Code | DPL | Code | DPL | Code | DPL |
|---|---|---|---|---|---|---|---|
| 39 | 023 | 60 | 143 | 81 | 315 | 102 | 532 |
| 40 | 025 | 61 | 152 | 82 | 331 | 103 | 546 |
| 41 | 026 | 62 | 155 | 83 | 343 | 104 | 565 |
| 42 | 031 | 63 | 156 | 84 | 346 | 105 | 606 |
| 43 | 032 | 64 | 162 | 85 | 351 | 106 | 612 |
| 44 | 043 | 65 | 165 | 86 | 364 | 107 | 624 |
| 45 | 047 | 66 | 172 | 87 | 365 | 108 | 627 |
| 46 | 051 | 67 | 174 | 88 | 371 | 109 | 631 |
| 47 | 054 | 68 | 205 | 89 | 411 | 110 | 632 |
| 48 | 065 | 69 | 223 | 90 | 412 | 111 | 654 |
| 49 | 071 | 70 | 226 | 91 | 413 | 112 | 662 |
| 50 | 072 | 71 | 243 | 92 | 423 | 113 | 664 |
| 51 | 073 | 72 | 244 | 93 | 431 | 114 | 703 |
| 52 | 074 | 73 | 245 | 94 | 432 | 115 | 712 |
| 53 | 114 | 74 | 251 | 95 | 445 | 116 | 723 |
| 54 | 115 | 75 | 261 | 96 | 464 | 117 | 731 |
| 55 | 116 | 76 | 263 | 97 | 465 | 118 | 732 |
| 56 | 125 | 77 | 265 | 98 | 466 | 119 | 734 |
| 57 | 131 | 78 | 271 | 99 | 503 | 120 | 743 |
| 58 | 132 | 79 | 306 | 100 | 506 | 121 | 754 |
| 59 | 134 | 80 | 311 | 101 | 516 |
Task 9
CLS1110 vs CLS1410: which one do I actually have?
The two radios are physically identical, so the fastest way to tell them apart is the display. A CLS1110 shows channel 1 and nothing changes when you press + or −. A CLS1410 cycles through channels 1 to 4.
Which one suits your team
Beyond channel count, the CLS1410 adds scan across those four channels, VOX hands-free operation with a compatible accessory, and VibraCall silent vibrating alerts. Everything else — the 1-watt transmitter, 56 frequencies, 121 codes, 200,000 square feet of indoor coverage, 14-hour battery, MIL-STD-810 durability and every accessory — is the same on both.
In practice the deciding question isn't budget, it's whether your teams need to talk past each other. A single restaurant floor or a small retail store runs fine on one shared channel. The moment you have a receiving crew, a sales floor and a manager who all need separate conversations, one channel becomes a traffic jam and the CLS1410 pays for itself in a week.
| Specification | CLS1110 | CLS1410 |
|---|---|---|
| Frequency range | UHF 459.5–469.5 MHz | UHF 459.5–469.5 MHz |
| Channel capacity | 1 | 4 |
| Selectable frequencies | 56 | 56 |
| Channel bandwidth | 12.5 kHz | 12.5 kHz |
| RF power output | 1.0 watt | 1.0 watt |
| Analog PL (CTCSS) codes | 38 | 38 |
| Digital DPL codes | 83 | 83 |
| Indoor coverage | Up to 200,000 sq ft / 18,580 sq m | Up to 200,000 sq ft / 18,580 sq m |
| Multi-level coverage | Up to 15 floors | Up to 15 floors |
| Battery life (5/5/90 duty cycle) | 14 hours | 14 hours |
| Dimensions (H × W × D) | 4.1" × 2.0" × 1.1" | 4.1" × 2.0" × 1.1" |
| Weight | Less than 5 oz | Less than 5 oz |
| Scan | — | Yes (up to 4 channels) |
| VOX hands-free | — | Yes, with compatible accessory |
| VibraCall vibrating alert | — | Yes (call tone 4) |
Transmitter and receiver specifications
| RF output (conducted into 50 ohms) | 1.0 watt |
|---|---|
| Frequency stability | Less than 2.0 ppm |
| Spurs and harmonics | Less than −45 dBc |
| FM hum and noise @ 12.5 kHz | −40 dB |
| Modulation limiting @ 12.5 kHz | ± 2.5 kHz |
| Adjacent channel power | 60 dBc |
| Audio frequency response (0.3–3.0 kHz) | +1 to −3 dB |
| Transmit audio distortion | Less than 2% |
| Receiver sensitivity (12 dB SINAD) | −122 dBm (0.18 uV) |
| Adjacent channel selectivity @ 12.5 kHz | 65 dB |
| Intermodulation rejection | 60 dB |
| Spurious response rejection (blocking 1 MHz) | 85 dB |
| Audio output at less than 5% distortion | 0.5 W @ 8 ohms |
| FCC designation | AZ489FT4860 |
| Industry Canada designation | 109U-89FT4860 |
How durable is the CLS Series?
CLS radios are tested to Military Standard 810 revisions C, D, E, F and G across 11 categories, including shock, vibration, high and low temperature, temperature shock, solar radiation, rain, humidity, dust and low pressure.
The radios are rated for a five-foot drop to concrete. Operating temperature is −30°C to +60°C and storage temperature is −40°C to +85°C.
The housings are polycarbonate with built-in anti-microbial properties that inhibit bacteria and mold growth on the radio surface — a detail that matters in food service and healthcare.
Also useful
Accessories and FCC licensing
Every CLS accessory works with both the CLS1110 and the CLS1410, so a mixed fleet only needs one accessory inventory. These are the part numbers in the Motorola documentation — useful when reordering something that arrived with the original radios years ago.
Swivel earpiece
Discreet listening for front-of-house staff.
PMNN4497ARechargeable Li-Ion battery
Spare or replacement battery.
56531Multi-unit charger
Charges six radios or batteries. Also does cloning.
HCLN4013ASwivel belt holster
Replacement for the holster in the box.
Do Motorola CLS radios require an FCC license?
Technically yes — but a license is not required to purchase radios. The CLS Series operates on business-exclusive frequencies regulated under FCC Part 90. That licensing requirement is exactly what makes the frequencies business-exclusive: it's why a CLS fleet isn't competing with every consumer walkie-talkie in the shopping center, and it's a practical difference between the CLS and an FRS radio.
Applications are filed on FCC Form 601 (schedules D and H) with remittance form 159; the FCC bundles the forms and instructions as document 000601. Licenses run a ten-year term and cover your organization rather than individual radios, so one license typically covers a whole fleet. Before you apply you'll need to know which frequencies you intend to operate on — which is what the frequency chart above is for.
Frequently asked
Motorola CLS Series FAQ
Will a CLS1110 talk to a CLS1410?
Yes. Both models ship set to frequency 2 with interference eliminator code 1, so a new CLS1110 and a new CLS1410 communicate on channel 1 with no setup. To keep them talking after you reprogram anything, the frequency and the code have to match on both radios.
Can a CLS radio talk to a Motorola Talkabout or other FRS walkie-talkie?
No. The CLS operates on licensed Part 90 business frequencies between 461 and 469.5 MHz. Consumer FRS radios operate on a different set of shared public frequencies under Part 95. The two cannot communicate, and that separation is the point — it's what keeps your staff off the same channel as everyone else in the building.
What's the difference between a channel and a frequency?
A frequency is one of the 56 actual radio frequencies the CLS can transmit on. A channel is a saved slot on the radio that holds a frequency plus an interference eliminator code. The CLS1110 has one slot; the CLS1410 has four. That's why a one-channel radio still gives you 56 frequencies to choose from — you're just choosing one at a time.
Why can I hear another business on my radio?
Someone nearby is on the same frequency. Interference eliminator codes reduce what you hear from them. The fix is to move your fleet to a different frequency from the chart above, changing every radio so they stay in sync.
How far will a CLS radio actually reach?
Motorola rates the CLS at up to 200,000 square feet indoors or up to 15 floors in a multi-level building. Outdoor mileage claims vary widely between listings because outdoor range depends entirely on terrain and obstructions. The indoor figure is the number to plan around, and a 1-watt radio in a steel-and-concrete building will fall short of it — check for line of sight before assuming a radio is faulty.
Is the CLS Series waterproof?
No. CLS radios are dust-protected and splash-resistant and are tested to MIL-STD-810 revisions C through G, including a five-foot drop to concrete, but they are not rated for immersion. A radio that goes into water should be turned off, have its battery removed, and be dried completely before it's used again.
How do I turn off the beeping on a CLS radio?
Hold the − button while turning the radio on. That toggles keypad tones, which are on by default. If the beep you're hearing comes at the end of someone's transmission rather than on button presses, that's the end-of-transmission tone, toggled by holding + while turning the radio on.
How many radios can share one channel?
There's no hard limit — a channel is a shared party line, and every radio set to the same frequency and code hears every transmission. The practical limit is conversational: once more than about eight to ten people need to talk regularly, the channel gets congested and it's time to split departments onto separate channels with the CLS1410.
What's the difference between a two-way radio and a walkie-talkie?
Nothing technically — they're the same device. "Walkie-talkie" is the everyday term, more often associated with consumer FRS radios, while "two-way radio" is the term used in commercial and licensed contexts. A Motorola CLS1410 is accurately described by both.
Getting help with your CLS radios
Tech Wholesale has been an authorized Motorola dealer since 1997, and CLS radios have been part of that catalog for most of it. If you're adding radios to an existing fleet and don't know what frequencies you're currently on, or you're not sure the CLS is right for your building, talk to us before you order. That conversation takes a few minutes and it prevents the most common and most expensive mistake we see: buying on price alone and discovering the coverage gaps after deployment.
Every specification, chart and procedure on this page is taken from the Motorola CLS user guide, brochure and product spec sheet.
Motorola, MOTOROLA and the Stylized M logo are trademarks of Motorola Trademark Holdings, LLC.